Author: waldoherbs

  • Meditation For Everyone (I swear)

    Meditation For Everyone (I swear)

    Meditation For Everyone (I Swear)!

    My Meditation Journey

    It’s the beginning of 2025 and maybe you, like many people, have decided that this is the year you are going to live more mindfully and invite more peace and calm into your life. I applaud your new plan! I too have decided to make 2025 my year of living simply and mindfully. I will have more time to sit and read, bake bread, can vegetables, do arts and crafts, and meditate for hours! Then reality sets in and I realize I own a business, am starting a new business, am going to school full time at 2 different schools, and have a husband who expects me to acknowledge his presence periodically. Ok, so maybe the vision of blissfully meandering through my day with birds chirping, sun shining, and sitting for hours sipping a cup of tea is not quite going to happen. Maybe baby steps are the better, more likely, way to go. For me, this means really getting serious about my meditation practice. Again.

    I first learned about meditation in 2004 when I did my yoga teacher training. We just barely touched on the idea of meditation during the teacher training program, and I couldn’t really get a full handle on what it is that you do during meditation. I am that girl that needs all of the information before I can dive into anything. The instructions of sit quietly, calm your mind of all racing thoughts, achieve enlightenment just didn’t quite get me there. How are you supposed to sit? Must you sit on the floor or meditation cushion with your legs in full lotus pose with your hands on your knees, palms up with middle finger and thumb touching? How do you actually go about calming your mind? Do I completely suck at meditating if my mind wanders? Is there a certain style of meditation that is best and that “true gurus” use?

    All these questions and so many more just kept swirling around my head. I felt that there was no reason to try meditating if I wasn’t going to “do it right”. So, for many years I just didn’t. Then my husband decided we should try Transcendental Meditation. We paid some guy a whole bunch of money to give us private lessons and it was a pretty big waste of time and money. Not that I’m saying there is anything wrong with paying a teacher or with this style, it just wasn’t for us. We were told that we needed to meditate for 20 minutes twice a day for it to be effective. And we tried. Really we did. For about 3ish months we went to classes with our teacher and sat for 20 minutes twice a day. With this particular type of meditation, your teacher gives you a sound/ word that you are supposed to repeat like a mantra. The word I was given sounded like “whoring” and I felt so weird sitting quietly with my eyes shut silently chanting “whoring”.  After a few months, we decided that maybe that style of meditation wasn’t for us, and we went on with our lives.

    Fast forward another few years and after a several-year break, I found myself back in the health and wellness world. I got back into massage therapy (which I sadly had left for a while) and found sound healing and started offering sound bath meditations. I got back into meditation and read every book I could find. I went on retreats and took classes on how to meditate and how to teach meditation. I signed up for meditation apps and watched about a million YouTube videos. After all of that, I feel like maybe the questions “what is meditation and how do you do it” are almost unanswerable. I think maybe it’s just something you have to find on your own. So that’s it. Good luck!

    Woman meditating

    Ok, just kidding. While I do find that meditation is a very personal journey that is completely different for everyone, I think there are some important tips to help get you started. Please note that I do not consider myself a guru or even a particularly good meditation teacher. I have taught some classes, and I feel like they have gone pretty well, but my personal meditation practice is sometimes fairly lacking. But I think that’s good because recently I started thinking about why that is and how I can fix that and how I can help others fix that. I had listened to a podcast about creating new habits that was really pretty life changing. I’m not usually a podcast/ motivational speaker kinda gal, but this one was awesome (https://podcasts.apple.com/us/podcast/450-how-to-break-free-from-whats-holding-you-back-and/id1379050662?i=1000682136490).

    He talks about how you can take a new habit you want to create and piggyback it onto an existing habit. I realized that if I was going to truly commit to a daily meditation practice, I was going to have to create a new habit. I needed to figure out where in my schedule it was going to fit and make sure everything was in place and ready to go. Every morning, I get up and go to the bathroom and then head downstairs to get coffee and make my breakfast. I don’t need a reminder to do this as it just happens every single morning. I decided I could slip a meditation practice in between the bathroom and breakfast, and it would be a fairly seamless addition. The other thing I needed to do was figure out where I was going to meditate and if I needed any “meditation tools”. I decided on a chair in my bedroom that is tucked into a cozy corner. I keep a blanket right there in case it’s a chilly morning. I also keep a journal there in case I have a total epiphany during my meditation and need to write it down lest I forget my brilliant idea.

    So now I can tuck this new habit right into an existing habit and it just becomes routine. I meditate every day now and I absolutely love it! I’m proud of myself for creating this space for myself and I am calmer and better able to handle life’s challenges because of it.

    Here’s a little recap and some things to consider when first starting out on your meditation journey or, if you are a long-time meditator, but are trying to get more consistent.

    1. The very first thing you need to know about how to start a meditation practice is how to fit it into your life. Don’t stress about how to meditate until you figure out how it fits in your schedule. Some things to consider:
      1. How long do you want to meditate for each day? I would suggest starting small and working up. 5 minutes is really all you need, and you can work up from there if you want. I promise that even 5 minutes will help you be more responsive to life and less reactive.
      2. Where are you going to meditate? Brushing your teeth is a habit that probably most of you have and it’s super easy because everything is there where you need it. If you had to go find your toothbrush every morning, figure out how to get water and toothpaste, and watch a video on best brushing techniques, you probably wouldn’t do it because that’s a pain in the a$$. Make your meditation habit that simple. Find a spot, make it comfortable, and have some sort of alarm clock. If there are other people in your home, let them know that this is your meditation time and you are off limits (I am working on a separate post on how to fit meditation into your life so stay tuned for that). I find it best to have a timer so I don’t end up meditating for 3 hours and missing work. That’s typically frowned upon.
      3. For the first month-ish, I would suggest focusing on creating the habit and not worry so much about how to meditate. Just get into the routine of sitting quietly every day for your allotted time. Make this a joyful experience. Make sure that your meditation chair or cushion is comfortable without being so comfortable that you might fall asleep. Know that this is your time to be fully present. Don’t think about your to-do list or the fight you had with your husband/wife/mom/ best friend/ whatever. Be blissfully aware that you don’t have to be doing anything. You don’t have to fix anything for anyone or listen to someone else’s problems. You just get to sit and breathe and be. The keyword is “get” btw. You get to meditate; you don’t have to meditate. You aren’t in time-out. If your meditation practice isn’t joyful, you probably won’t stick to it.

    In my next post, I will go into some detail about some different meditation techniques. I find that every single day is different and a meditation that worked great for me yesterday is just not cutting it today. I will also talk about some of the pitfalls that people fall into with meditation and how to avoid them. For now, just go and start creating the space for meditation in your life and we will get to the “how-to” very soon. Until then, take a deep breath and know that you are worth this time.

     

  • Fire Cider

    Fire Cider

    Fire Cider

    Fire cider is one of my favorite herbal medicines to make. Although the term “fire cider” was coined by the amazing Rosemary Gladstar in the late 70’s or early 80’s, this type of medicine has been around for thousands of years. Vinegar can be traced back to at least 5000 B.C.E. and has been documented as being used for medicinal purposes by the Babylonians. That’s a whole lot of historical evidence of its efficacy. Not to mention the countless studies that have been done on vinegar and herbal infused vinegar. All that being said, it has worked wonders for my husband and me over and over again, so I say, “bring on the fire cider”!

    Table of Contents

    What is Fire Cider?

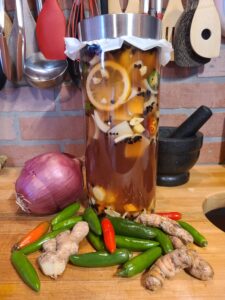
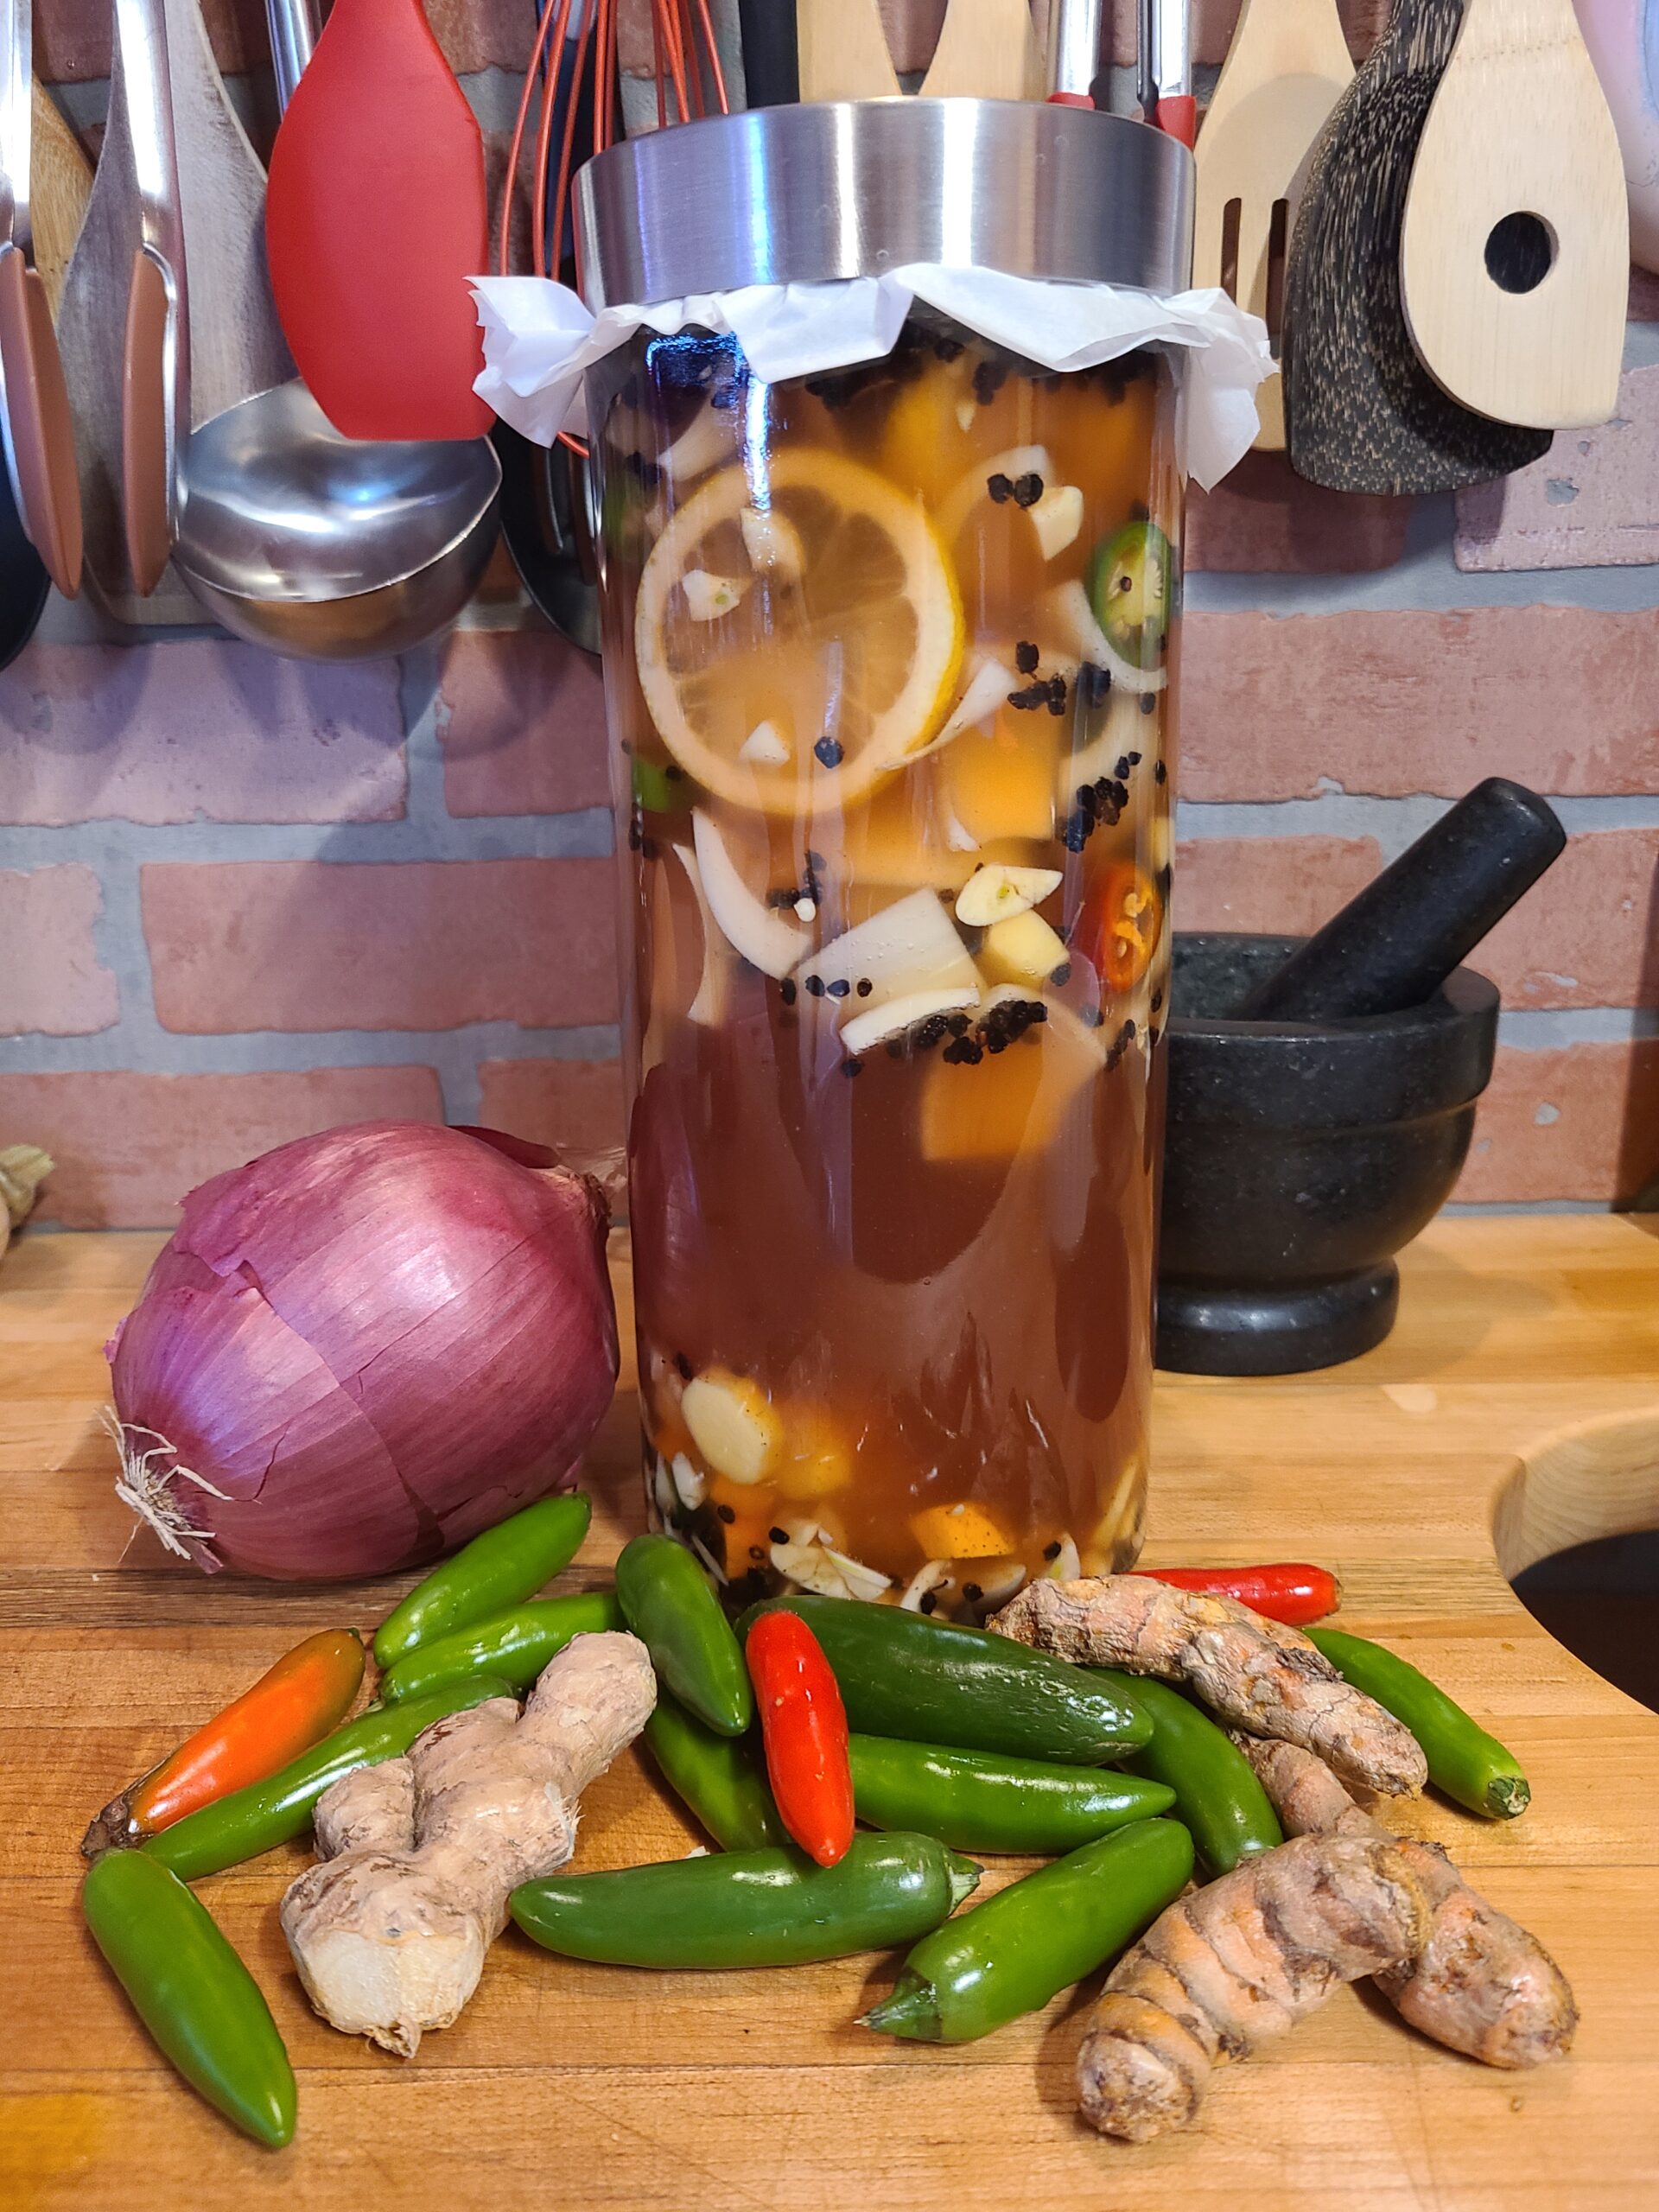
    You might be asking what fire cider is and what it does. Fire cider is sort of a blanket term for herbal infused vinegar (typically apple cider vinegar) that is meant to be taken internally. Although there are as many recipes for fire cider as there are herbalists and herbal enthusiasts, the fairly standard, base recipe is ACV (apple cider vinegar), raw onion, raw garlic, hot peppers, ginger, and honey.

    As for what it does, my answer to you is, “what doesn’t fire cider do”?? Ok, that’s probably a bit of an exaggeration. I would never rinse my eye out with fire cider if I had pink eye or snort fire cider through a neti pot. There are probably a bunch more things that I wouldn’t use fire cider for, but there certainly are plenty of reasons for always having it on-hand.  Whenever I feel like I have a tickle in my throat or maybe I’m coming down with something, I immediately reach for the fire cider. I typically take fire cider with me when I have to travel. If I know things are going to be extra special stressful for awhile (like the holidays), I take fire cider daily for prevention. Fire cider will help prevent illnesses such as colds, flus, strep throat, and other common ailments. It is antibacterial, antiviral, antifungal, boosts your immune system, and so much more. There are even some studies that have shown that ACV can aid in weight loss and The American Diabetes Association has stated that “vinegar can significantly improve postprandial insulin sensitivity in insulin-resistant subjects” (Diabetes Care, January 2004). ACV has vitamins B & C, phosphorus, potassium, calcium, iron, magnesium, and pectin. Infusing herbs into it makes it an even more potent medicine!

    There is no specific recipe for fire cider. Even for me, it’s slightly different every time I make it. I have my basic guidelines for the recipe, but it’s also a bit intuitive. If there is an herb growing in my garden when I make it that seems like a fun or helpful addition, in it goes. My base recipe tends to be pretty much the same every time, although the quantities definitely change. I’m more of a “some of this, some of that” kind of herbalist.

    Following is a list of basic ingredients that I always put in my fire cider and the reasons they are included. After that, I have some ingredients that also make great additions. My recipe is below that and there are quantities listed, but feel free to mix it up and tweak it as you see fit.

    My Standard Ingredients

    Apple Cider Vinegar – almost every recipe I have ever seen for fire cider uses apple cider vinegar as the base. This is the “cider” part of “fire cider”.  I did see one recipe once that used balsamic vinegar, but I will stick with ACV.  As stated above, ACV is full of goodness in the form of vitamins, minerals, fiber, and acetic acid. Traditionally, it has been used for stomach problems, sore throat, leg cramps, exhaustion, fungal infections, weight loss, as a hair rinse, and has even been used to treat fevers. When making fire cider, make sure to use organic, raw, unfiltered apple cider vinegar. Raw ACV still has “the mother” which is a cloudy, sort of gelatinous substance that is made up of prebiotics, proteins, enzymes, minerals, polyphenols, vitamins, and other compounds produced by friendly bacteria. It’s good stuff and will make your fire cider even more beneficial.

    Honey – as with ACV, it’s best to use organic, raw, unfiltered honey. All honey is good, but raw is better. Also, try to use honey that is local to your area. Aside from making your fire cider more palatable (I personally don’t love the taste of fire cider)(some people absolutely love it)(I’m not one of those)honey contains a lot of good healing stuff all on its own. I have used honey to treat severe burns and wounds, it helps with sore throats, has antioxidants, is anti-inflammatory, and can help with some gastrointestinal issues.

    Garlic – use raw, organic garlic when possible. Garlic is a powerful antimicrobial herb and is effective against harmful bacteria, viruses, parasites, and fungal infections. It has this effect throughout the whole body including the lungs which makes it great for treating respiratory ailments.

    Onion – raw onions have similar healing properties to garlic and contain antioxidants and are anti-inflammatory.

    Hot Peppers – I typically use raw cayenne peppers from my garden, but you can certainly use dried peppers. The hotness level depends on you and your preferences. This is the “fire” part of “fire cider”.  Cayenne peppers are a strong circulatory stimulant. They get your blood and lymph fluid moving. They are also a great vital force stimulant and are powerfully anti-inflammatory.

    Ginger – I typically use raw, organic ginger, but dried will work as well. You can usually find raw ginger in the produce department of most grocery stores. Ginger is amazing for your digestive system and has been used to treat all kinds of nausea. It is a warming diaphoretic herb which means it helps promote an effective fever response to infection and then helps disperse that heat. It also has relaxing qualities that will help loosen tight muscles and can help relieve cramping.

    Turmeric – as with ginger, I like to use fresh turmeric. You can often find it packaged with ginger in the produce section of the grocery store. Turmeric is well known for its anti-inflammatory actions and is particularly effective for inflammatory issues in the digestive system. It is great at stimulating the liver.  It is also antimicrobial.

    Lemon – I slice a whole, organic lemon and put the slices in my fire cider. They are high in fiber and vitamin C, and the citric acid may help dissolve kidney stones. Lemons also help the body absorb iron.

    Other Ingredients

    The above listed ingredients are pretty easy to find at the grocery store. Many of the following ingredients can also be found at the grocery store, or you can purchase them from my online shop.

    Elderberries – I put this in the “Other Ingredients” list, but I actually always include them in my fire cider. Well-known for their immune-boosting abilities, elderberries are incredibly effective for treating colds and flus. They are packed with antioxidants and vitamins and are anti-inflammatory and antispasmodic.

    Thyme – extremely antimicrobial, thyme can help you combat most of the things that ail you. As I’m typing this, I’m wondering why I don’t just always include thyme in my fire cider. Thyme is one of those “must-haves” for cold and flu season. I typically use thyme as a steam for respiratory infections, but there are a million reasons to add it to fire cider as well.  Thyme can kill viruses and calm your nervous system at the same time.

    Rosemary – not just a nod to Rosemary Gladstar, the coiner of the term “fire cider”, rosemary the herb is also an excellent cold and flu herb. It stimulates circulation and protects the heart. It’s excellent for digestion and helps protect the liver. It is also antimicrobial and an expectorant to help coughs be more productive.

    There are tons of other ingredients people use in fire cider. You will often see horseradish as well, but I have never tried that. Pine needles, oregano, sage, hawthorn berries, echinacea, and black peppercorns are other ingredients that I have often seen in fire cider recipes. If there is an herb or other ingredient that you are super in love with, totally throw that into the mix! They sky is the limit when it comes to fire cider and there are no wrong answers here.

    Overview of Making Fire Cider

    So, you may be asking how to actually make the fire cider. That’s an excellent question! It’s actually super easy. For the most part, you just throw all the ingredients in a jar and cover it by 2-3” with apple cider vinegar. Put a lid on it and shake it every day or so for about 4-6 weeks. Filter all the stuff out and the remaining liquid is your fire cider.

    A Few Things to Note…

    Fresh ginger and turmeric – I don’t necessarily peel them, but I definitely get the papery bits off and make sure there is no dirt or mold. I sort of half-ass peel them and then coarsely chop them up.

    Garlic and onion – Peel and coarsely chop these up before they go in.

    Lemons – Make sure to wash them well especially if they are not organic. If you want to be really on the ball, drop the whole lemon in boiling water for a minute or two to get the waxy coating off. You can also place them in a colander and pour boiling water over them and then scrub under cool water. I slice the whole lemon up into pretty thin slices, but some people prefer to zest them and just use the zest. I’m not really sure why. The whole lemon has so much goodness.

    Honey – I personally can’t imagine fire cider without honey, but some people prefer not to use honey. Some people are weird.

    Step-by-Step Instructions

    1. Gather all the ingredients you plan on using and get a jar that will be plenty big enough to hold everything. I would strongly recommend a glass jar. No reason to add plastic to your health tonic.
    2. Peel, chop, slice, and otherwise prepare all your ingredients and add them to the jar. Add some honey. This is very much a personal preference thing. I would start small. You can always add more honey later. In fact, many people don’t add the honey until after the vinegar has been infused and the marc (all your other ingredients) has been filtered out.
    3. Pour in the apple cider vinegar until it has covered all of the ingredients by at least 2-3 inches.
    4. Put the lid on the jar tightly. Vinegar is very acidic and will corrode metal. If the lid for your jar is metal, you can put a double layer of wax paper over the top of the jar and then put the lid on.
    5. Label your jar. This is a very important step!! I use blue painter’s tape because it stays on the jar well but peels off without leaving any sticky residue. Put exactly what you put in the fire cider and the date on the label.
    6. For the next 4-6 weeks, shake your jar every day or so and tell it how much you love it. Infusing your fire cider with love will ensure its efficacy. This is a scientifically proven fact. Ok, probably not really, but I think it is an important step in the process.
    7. After 4-6 weeks, it is finally time to filter out the marc (herbs and such). Using a fine mesh sieve, strain your fire cider. I like to strain into a large pitcher or something with a spout so I can then pour the fire cider into bottles. Some people like to use the marc in stir fry’s, soups, or stews. I have never actually tried this as I don’t really like the taste of fire cider. I typically just compost the marc.
    8. Bottle your fire cider in a glass jar and label. It will keep for at least 6 months although I have actually kept mine longer and it was just fine.

    How to Use Fire Cider

    In my house, we typically take 2 tablespoons of fire cider when we feel like we might be coming down with something. If I am feeling particularly stressed or run down, I usually take a couple tablespoons for prevention. It can be taken every day for general health and prevention.

    Fire cider can also be used to treat fungal infections on the skin. For things like toenail fungus or athlete’s foot, you can pour about ¼ cup of fire cider into a foot bath with warm water. Soak for a good 20 minutes a few times a day until the issue has been resolved. Please use common sense, however. If the issue continues to get worse or doesn’t clear up in a couple of days, you may need to see a doctor.  If the fungal infection is on another part of the body like the back or arms, you can always soak a towel in fire cider and use it as a compress.

    Cooking with Fire Cider

    As Hippocrates said, “let food be thy medicine, and medicine be thy food”.  Cooking with fire cider is a great way to take your medicine. You can substitute fire cider in any (savory not sweet) recipe that calls for vinegar. You can also mix it with oil for a delightful and spicy vinaigrette. It works well as a marinade or mixed with sour cream or mayonnaise for a fun dip. You can even use it in cocktails and mocktails like Bloody Mary’s or spicy margaritas. Really the possibilities are endless!

    So go forth and make fire cider! Make a big batch and share with friends and family. It makes a great gift!

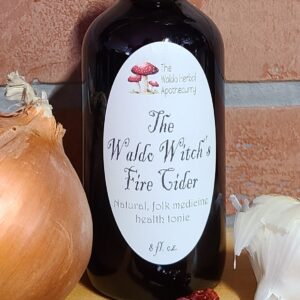
    Bottle of fire cider

    The Waldo Witch’s Fire Cider

    A health tonic for help in preventing colds and flus. This is more of a general idea of making fire cider, not so much a hard and fast recipe. Use what you have and don't stress if you can't get everything. Also, feel free to add ingredients that call to you.

    Equipment

    • 1 Large Glass Jar with a Lid
    • 1 Fine Mesh Sieve or Strainer
    • Bottle or bottles for storing after it's ready

    Ingredients
      

    • 1 whole onion
    • 1 head of garlic
    • 1 organic lemon
    • 2-4 cayenne peppers (dried or fresh)
    • 6-8 oz. fresh ginger
    • 6-8 oz. fresh turmeric
    • 2 oz. dried elderberries
    • 6-8 oz. raw honey
    • raw, unfiltered apple cider vinegar

    Instructions
     

    • Peel and coarsely chop onion and garlic.
    • Wash and lazily peel ginger and turmeric then coarsely chop.
    • Wearing gloves, wash and coarsely chop cayenne peppers.
    • Wash and thinly slice lemon.
    • Add all ingredients except the vinegar to a large, glass jar. Pour in enough vinegar to completely cover all ingredients by at least 2-3 inches. Put the lid on the jar using a double layer of wax paper first if the lid is metal.
    • Label the jar with the ingredients and the date.
    • Shake the jar every day or so for 4-6 weeks. After 4-6 weeks, strain the liquid out and bottle.
    • Store in a cool, dark cabinet for 6ish months.


  • Hawthorn Rose Cordial

    Hawthorn Rose Cordial

    Hawthorn Rose Cordial

    A cordial is a sweetened, distilled liquor. In herbal medicine, cordials are a fun and delicious way of taking your medicine. Also called elixirs, cordials are made by sweetening a tincture with honey or syrup. Because you are going to drink a cordial, it is best to use a tincture that tastes good on its own and is not extremely potent. If you would only take a drop or two of a tincture and drinking a glass of it is going to make you vomit, probably don’t use it for a cordial. Cordials are meant to be sipped in very small amounts such as 1-2 teaspoons. You can also dilute them in sparkling water. Please remember that herbal cordials are actually medicine so not the best thing for a crazy night of drinking. I like to have a teeny, tiny little glass of cordial before bedtime to help me sleep sometimes.

    For this particular recipe, we are going to be using hawthorn berries and rose petals as our herbal constituents. For the roses, it really is best to use dried, organic rose petals that are meant to be eaten or made into tea i.e. don’t get gas station roses and make cordial out of them. You can purchase dried rose petals from your local herb shop or in my little online herb shop

    Hawthorn Benefits

    I made this cordial originally for my cousin who is having some issues with his heart. He asked if there was an herb to help strengthen his heart and I immediately said hawthorn. There are several different types of hawthorn, but they are all used pretty interchangeably. Some hawthorn varieties are large shrubs, and some are trees. They all have extremely vicious thorns, however, so be aware if you are out in nature picking them. The thorns offer protection for the plant itself as hawthorn berries, leaves, and flowers offer protection for us. Hawthorn is a heart protector and strengthener physically as well as emotionally. It helps the heart work more efficiently and effectively by pumping more blood through with fewer beats. More blood in the heart also means more oxygen and nutrients can get to the heart tissue to help repair any damage that your heart may have sustained. 

    Hawthorn can also help lower the bad cholesterol and studies have shown that it can help repair the heart from mild to moderate heart disease. Heart disease is the number one cause of death in the United States so protecting your heart is protecting your life. Now, let’s be real. I’m not saying that having a glass of Hawthorn Rose Cordial every night is going to save your life. This is meant as a once-in-a-while treat. If you are looking to add hawthorn to your daily life to help heal a damaged heart or for heart protection, a dropperful of hawthorn tincture or some hawthorn berry tea is very helpful. Please be mindful that hawthorn can interfere with some heart medications so if you are on serious heart drugs, talk to your doctor. 

    Emotionally, hawthorn helps protect your heart during stressful times. It helps us during times when we are feeling vulnerable or fragile. It is a relaxing nervine that can help when you are dealing with grief and heartbreak.

    There are many other health benefits of hawthorn, but I won’t go into those here. You can check out my herbal monograph for hawthorn here to get some more information. 

    Making Hawthorn Rose Cordial

    There are several steps involved in making this cordial, but I promise, it’s worth it! The first thing you need to do is make the hawthorn tincture. This is super easy, but it does take about 4 weeks to make. Tinctures are just herbs infused into alcohol. You will place the dried hawthorn berries and vodka in a jar with a lid. I prefer canning jars but use whatever you have on-hand. No plastic though. Put a label on the jar with the ingredients, the amounts, and the date so you remember what it is. Every day or two, shake the jar up a bit and tell it how much you love it and how you are so excited to be working with it. I like to infuse a lot of love into my tinctures as well as herbs. 

    After about 4ish weeks, filter out the herbs and compost them. Pour the finished tincture into a jar and label it. Ta Da! Hawthorn Tincture!!

    But wait, there’s more…

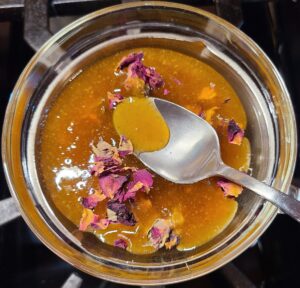
    Once you have the hawthorn tincture ready to go, you will now infuse the honey with the rose. I like to make a little double broiler by putting a small bowl on a small saucepan filled about halfway with water. Heating the honey this way is just a gentler way of heating it and honey is very susceptible to damage from heat. In the bowl, place about a quarter cup of dried rose petals or a little less than a quarter of an ounce. Completely cover the rose petals with honey. Stir it up a bit and add more honey if you need to. You aren’t trying to make a paste here so add plenty of honey. 

    honey and rose

    Slowly heat the honey until it is super runny. You never want the honey to go above 100 degrees because it will burn. So, heat it up and then turn the heat off for a bit. Then heat it slowly back up and then turn the heat off again. Do this periodically for about 2ish hours. If you forget to warm the honey back up that’s fine, just don’t forget to turn the heat off. Bees worked really hard to make that honey so treat it with respect! When you have decided that your honey is infused enough with the rose petals, warm it back up one more time. Warm, runny honey is way easier to filter. Pour the honey through a fine mesh sieve to strain out the rose petals and then compost them. Now you have delicious rose infused honey.

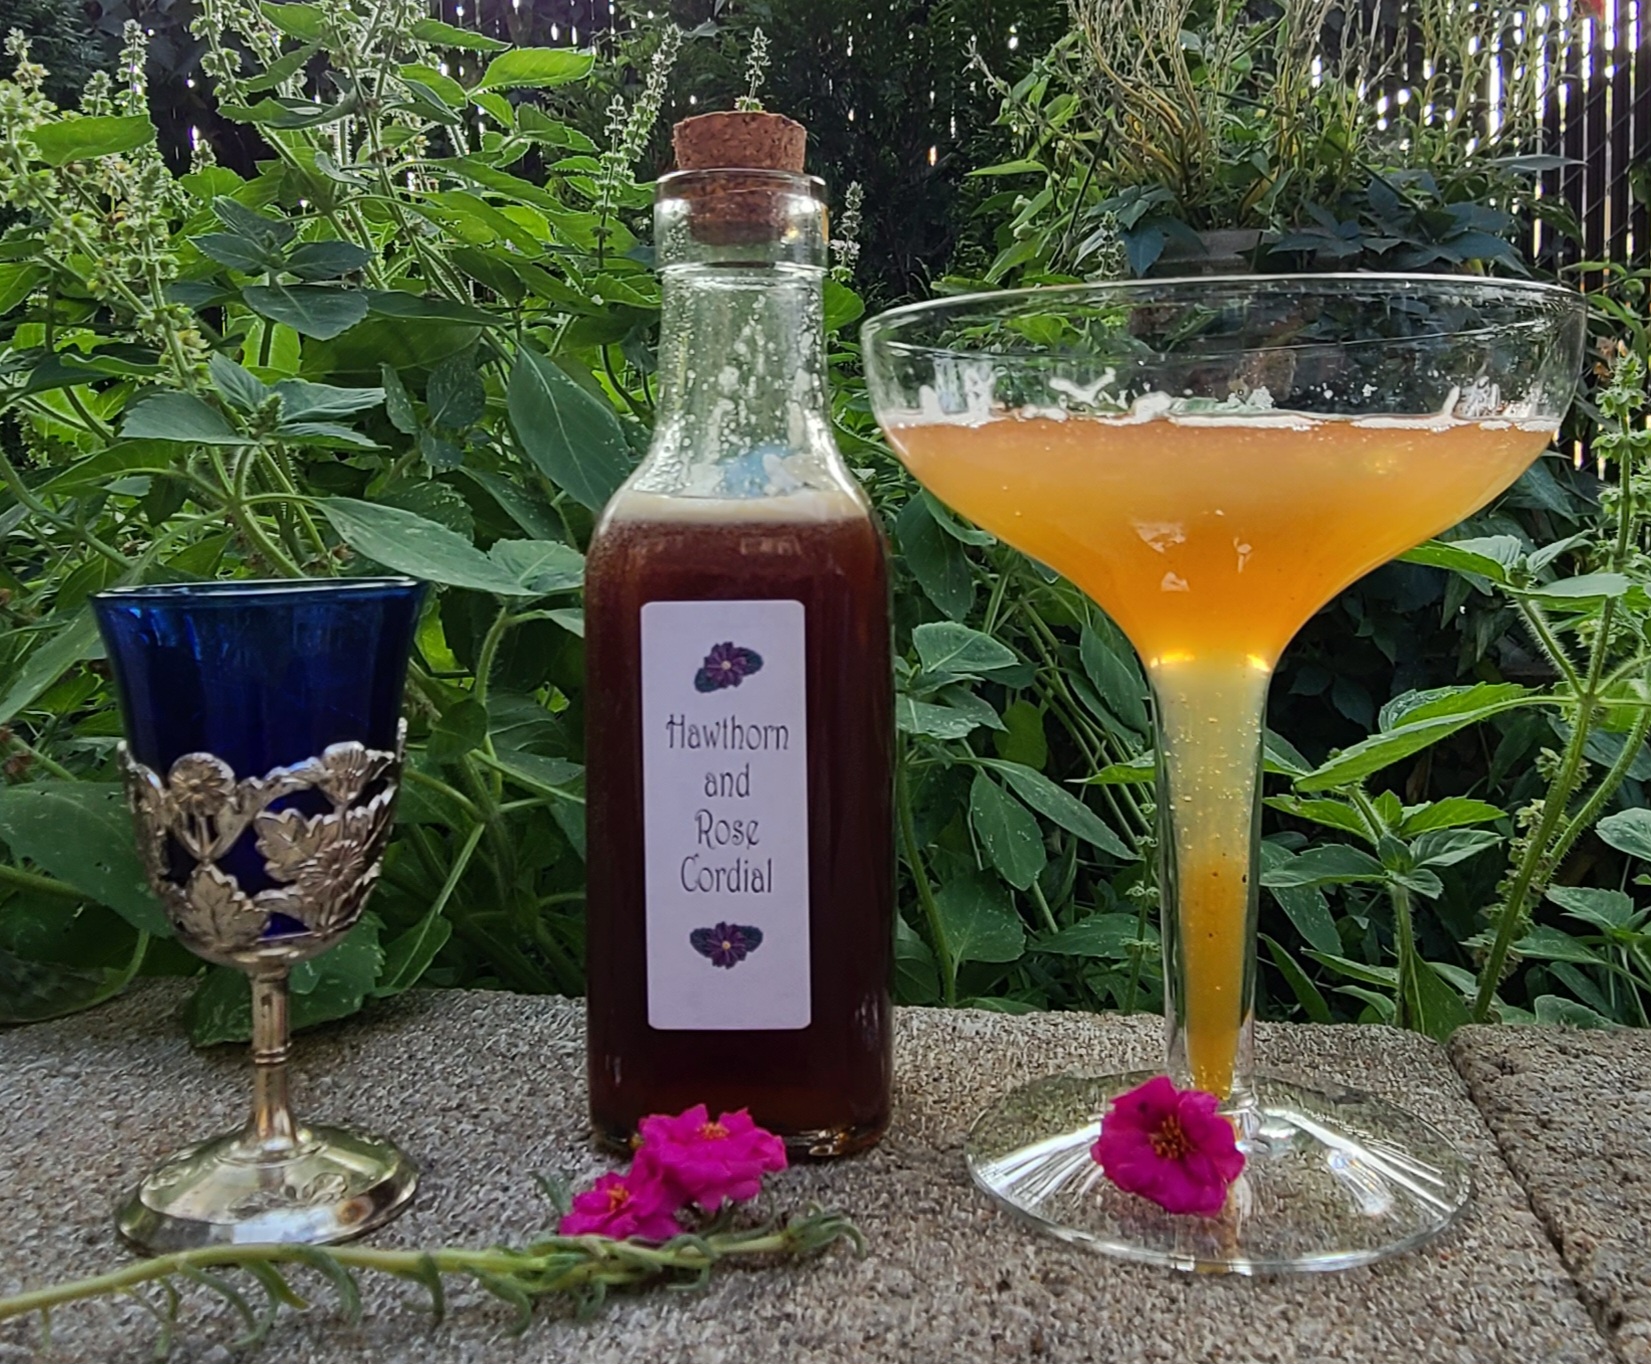
    Finally! To actually make the cordial, combine the hawthorn tincture and the rose-infused honey. Put it in a cute bottle with a cute label and enjoy! It is best to put a tiny bit (maybe a couple of teaspoons) in a tiny little cordial glass or shot glass and sip it very slowly. You can also add a couple of teaspoons to a glass of sparkling water or soda water and enjoy it that way. Feel free to use it in other botanical cocktails as well. 

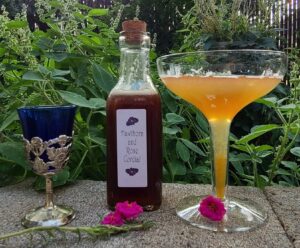
    Hawthorn Rose Cordial cocktails

    Hawthorn Rose Cordial cocktails

    Hawthorn Rose Cordial

    This is a sipping cordial. About 1-3 teaspoons is a serving size.
    Course Drinks

    Equipment

    • double broiler small bowl that will sit on top of a small saucepan
    • fine mesh sieve
    • glass jar to make the tincture in

    Ingredients
      

    • 1.5 oz. dried hawthorn berries
    • 5 oz. vodka
    • 1/4 cup dried rose petals
    • 1 cup honey maybe more

    Instructions
     

    • To make the hawthorn tincture, place the hawthorn berries and vodka in a glass jar with a lid. Label and shake every day or two for about 4 weeks. Filter out the hawthorn berries and compost them.
    • To make the rose infused honey, place the roses and honey in a small double broiler or a bowl that sits on top of a small saucepan filled about halfway with water. Heat slowly until the honey is warm and very runny then turn off heat. Reheat once it cools slightly and repeat. You want the honey to stay fairly warm, but never boil. Infuse for about 2 hours. Strain the roses out and compost them.
    • To make the cordial, combine the tincture and the honey in a bottle. Enjoy in servings of about 1-3 teaspoons. You can also add it to sparkling water or soda water or add it to other cocktails. Cordial will keep for about 6 months.


  • Ode to the Pervasive Plantain

    Ode to the Pervasive Plantain

    Ode to the Pervasive Plantain

    Plantain, plantain

    So much we can gain

    Healing wounds, killing germs

    Growing sweetly in the lane.

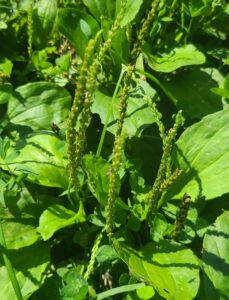
    This is my “Ode to the Pervasive Plantain”. There’s so much to say about plantain and one of the best things about it is that it grows almost everywhere. I was walking home from the grocery store today feeling sorry for myself because, inexplicably, my right eye lid is swollen. As I was walking, I was pondering what to do about this quandary when I looked down and saw a beautiful patch of plantain. “Oh!”, I exclaimed, “the perfect remedy”! I bent down and grabbed a few leaves to take home to make a poultice. As I was continuing my journey home, I realized that I should have gotten a photo for this blog post. Then I realized that there would be endless opportunities to get some good photos because plantain grows EVERYWHERE!

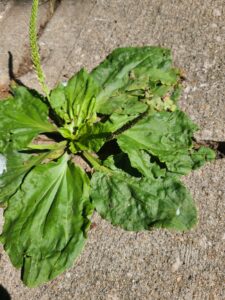
    photo of plantain growing out of the sidewalk
    Plantain growing in the sidewalk

    Now, don’t confuse the herb plantain with those funny little banana-like fruits at the grocery store. Yes, those are also called plantain, but I’m writing about the herb Plantago rugelii. Most people probably think this little plant is just another “weed”, but let me tell you, my friends, plantain is the best!

    Plantain is part of the Plantaginaceae family which also contains foxgloves and snapdragons although, I don’t believe either of those are typically used medicinally. There are a few members of this family that are used medicinally, Plantago major, rugelii, and lanceolata. In my area (Kansas City) I usually find the rugelii species.

    Ok, enough science-y stuff. Let’s get “real life” here. One of my favorite aspects of plantain is its vulnerary abilities, meaning it’s a wound-healer. Plantain works with all your skin tissues including the skin that lines your digestive tract. So not only will plantain heal your stubbed toe, but it will also heal your leaky gut syndrome! Been taking NSAIDS or other pharmaceuticals that wreak havoc on your digestive system? No worries! Have some plantain tea and it will heal right up. Ok, you might have to drink some every day for a bit, but better to heal it than just let it get worse. Maybe don’t drink plantain tea on its own, though. I don’t find it particularly tasty. You can just put some in with other herbs and it will still work. Calendula is a great addition along with peppermint or ginger, chamomile, and yarrow. By the way, this herbal tea will also make a great compress for that cut on your arm.

    With its drawing ability (like sucking out something not creating art), plantain is super helpful for stings, bites, rashes, and even splinters. A poultice or compress of plantain will help draw out the toxins from a poison ivy rash and then help heal the skin and relieve the itchiness.

    Plantain is anti-inflammatory, antimicrobial, antispasmodic, astringent, demulcent, diuretic, expectorant, styptic, and vulnerary. AKA, a great herb to have around and, thanks to Mother Nature, you can probably find some in your own backyard. Or here in my online shop it that’s easier for you. 😊

    Best ways to work with plantain

    You can work with plantain as a tea, tincture, or salve, but you can also just work with the fresh leaves. If you pick some leaves from a safe place (i.e., where it hasn’t been sprayed with weed killer or other chemicals) you can mash them up and put them right on the wound as a poultice. You can also use fresh leaves in tea to drink or to use as a compress. If you prefer to work with dried plantain, you can purchase it in my online herb shop.

    If you are using a compress, poultice, or salve for wound care, you can apply it 3-5 times per day. If you are drinking plantain tea to help heal your digestive system, 3-4 cups a day or a quart of tea a day is a good amount. You can’t really overdose on plantain, but make sure to pay attention to how your body is feeling. It is a diuretic, so if you are getting dried out, try adding something like marshmallow root or leaves to your tea.

    Precautions

    If you are harvesting your own plantain, please make sure you know what you are picking. Many plants can look similar to each other but have very different effects on the body. I like to use an app such as Picture This to help me correctly identify plants out in the wild (aka, outside my yard) (or even sometimes in my yard).

    Use of the plantain leaves is generally regarded as safe. As with all herbal medicine and pharmaceutical medicine, always pay attention to how your body is feeling. Although, I suppose you should just always pay attention to how your body is feeling! It’s a good habit to get in.

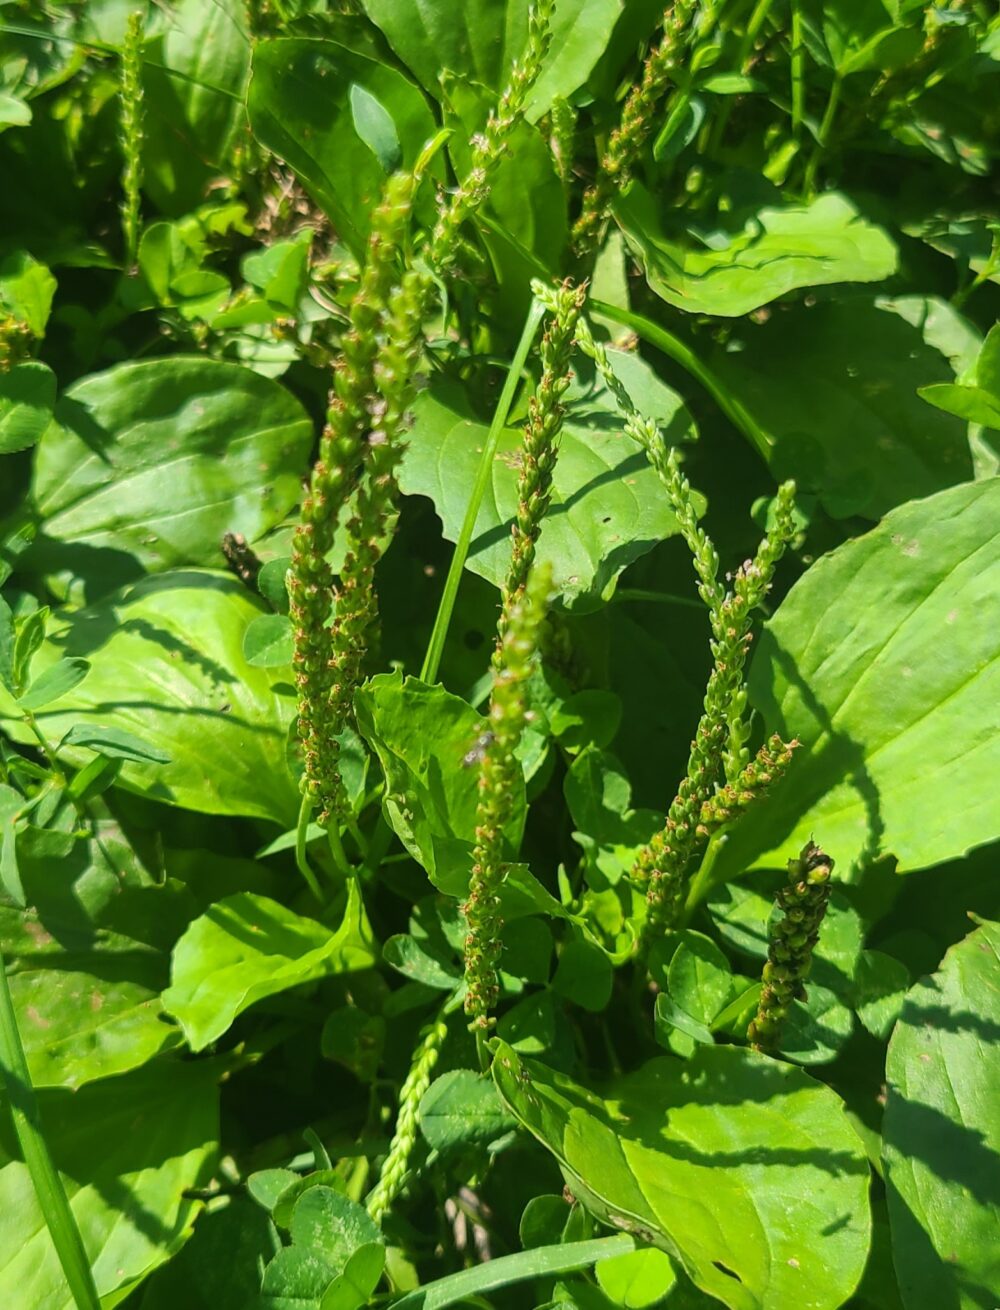
    photo of plantain

    So go out and pick some plantain. The fresh air will do you good too!

    A little disclaimer…

    The information here is not meant to diagnose, cure, treat, or prevent any illness. Please see a qualified herbalist or doctor before beginning to work with herbs for any serious health conditions and read and pay attention to any precautions listed for each herb. Herbs are powerful medicine and should not be taken for granted.

    You are completely in charge of your own health. The information here is meant for educational purposes only. It’s up to you what you do with this information. Please remember that no doctor can tell you what to do and how you should care for your body. It is your right and your responsibility to make the decisions regarding your own body. Finding your own path to wellness (whatever that means for you) is a journey. The information here is only to give you options on how to care for your body on that journey.

    The Curious Herb Newsletter

    Explore the amazing world of herbal medicine with our Herb-of-the-Month newsletter. Each month will bring in-depth information about a different herb including its therapeutic benefits, history, uses, recipes, and so much more. Who knew learning herbalism could be so much fun!


    * indicates required


  • The Humble Dandelion

    The Humble Dandelion

    The Humble Dandelion

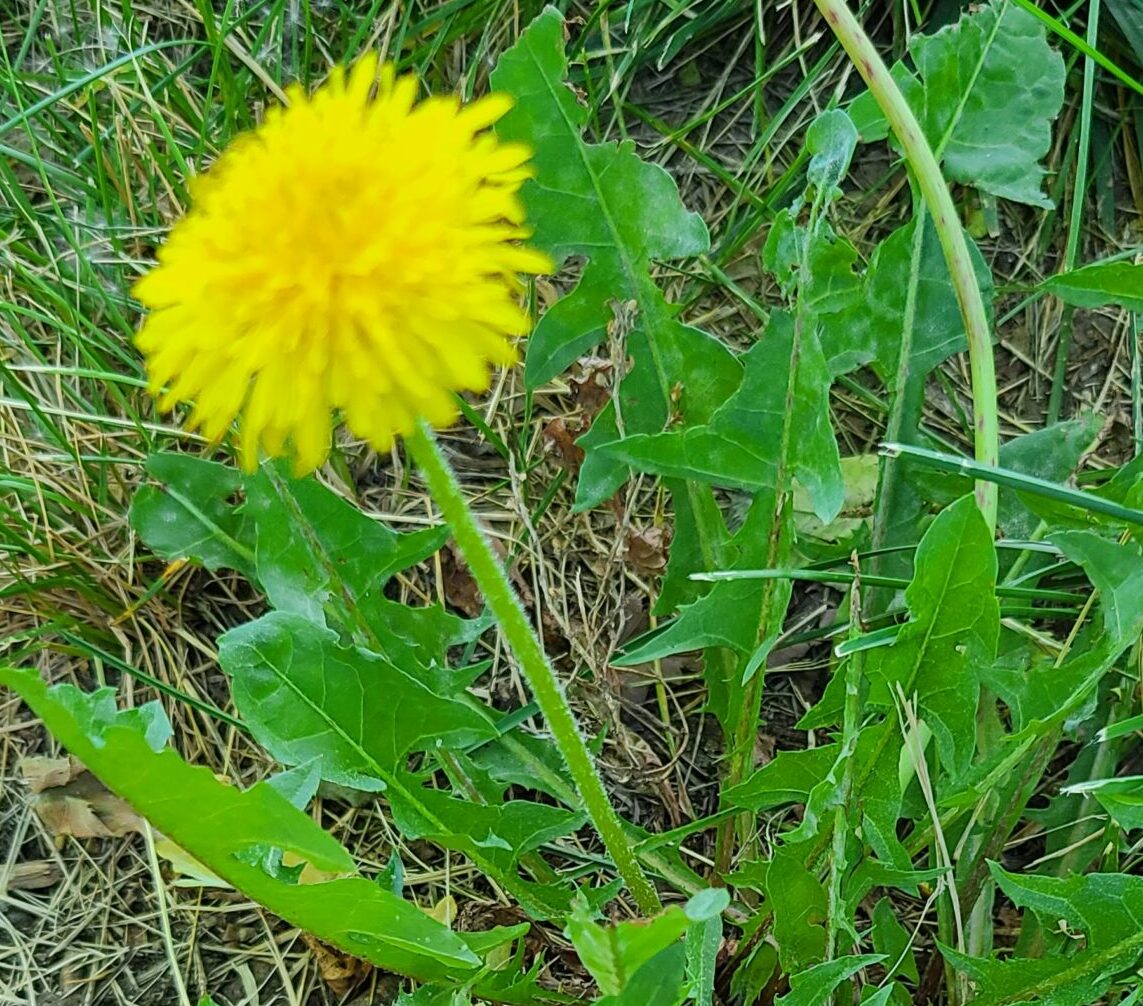
    After a long, harsh winter the popping up of dandelions makes so many people think “ugh! So much yard work coming up to get rid of these weeds!”. I, however, think, “yay! Medicine!”. With their bright, sunny flowers and beautiful green leaves, it is my goal in life to get people to change their minds about these oft maligned little flowers.

    Every single part of the dandelion is useful from the flowers that help with SAD (seasonal affective disorder) to the leaves which are unbelievably high in nutrients, to the roots which can help heal your kidneys, liver, and urinary system.

    Let’s take a closer look at each part of the dandelion and learn how we can work with this adorable little herb to make our lives better and healthier.

    Dandelion flowers are such a fun, sunny color. That golden yellow is so bright it’s almost as if the sun dropped some liquid down to earth and it made a flower. Ok, that might have been the cheesiest thing I’ve ever said, but I’m standing by my statement. And what’s more, dandelion flowers can help you feel sunnier! With their mood-elevating abilities, dandelion flowers can help pull you out of the winter doldrums. Or the summer, spring, or fall doldrums for that matter. Whatever doldrums you are in, dandelion will help.

    Dandelion leaves are extremely high in nutrients like calcium, potassium, vitamin A, and natural sodium. In fact, the sodium/ potassium combination makes it an excellent source of natural electrolytes.

    There is so much provitamin A in an ounce of dandelion that, as one of my favorite herb books says, “it makes a carrot blush”.  Vitamin A is super important as it helps with cell growth, organ function, immune support, eye health, and protection against cancer. So, it’s pretty important.

    Dandelion is also a diuretic which means it helps you pee and flush bad stuff out of your body. With many prescription diuretics, you can lose a lot of minerals through your pee, but with dandelion, you gain more than you lose.

    Dandelion root is a gentle laxative when things are a little stagnant, helps heal the liver, and it gets things moving through your digestive system more efficiently and effectively.

    The list of benefits from the humble dandelion goes on and on, but suffice it to say, its health-giving abilities are vast. So, how do we get these health benefits? Many, many ways actually! The easiest way is to just go outside, pick some from a good spot that hasn’t been sprayed with weed killer (sad face), wash them up a bit, and throw them in a salad. They are delicious and the bright flowers add such a fun pop of color to your salad! 

    Another easy way to enjoy the benefits of dandelion root is to make them into a vinaigrette salad dressing. You can use clean, fresh roots for this that you dug up in your yard or you can use dried roots. Place a handful in a jar and fill the jar with vinegar. Pretty much any type of vinegar will do. My first preference would not be white vinegar, though. Let the dandelion root steep in the jar for at least a week then filter out the roots. Mix the vinegar with olive oil or your favorite salad oil and any other herbs that seem fun. The standard ratio of vinegar to oil is 1 part vinegar to 3 parts oil. For the herbs, my Nostalgia Italia seasoning blend, Super Nutritious Herb Blend, or Herbs de Provence work great here. I also like to add in a bit of honey because I like my dressing on the sweeter side. Sometimes I will add in a spoonful of sour cream to make it a creamy vinaigrette. Anyway, it’s super easy to make and customize your own vinaigrette and when you start with an infused vinegar, you get all of those health benefits too!

    You can make tea from the flowers or leaves or make a decoction from the roots. You can tincture all parts of the plant or infuse it in honey. There aren’t too many ways you can’t use dandelion really. You can purchase dried dandelion root in my online herb shop.

    So, the next time you see a bunch of dandelions in your yard, don’t kill them, eat them!

    A little disclaimer…

    The information here is not meant to diagnose, cure, treat, or prevent any illness. Please see a qualified herbalist or doctor before beginning to work with herbs for any serious health conditions and read and pay attention to any precautions listed for each herb. Herbs are powerful medicine and should not be taken for granted.

    You are completely in charge of your own health. The information here is meant for educational purposes only. It’s up to you what you do with this information. Please remember that no doctor can tell you what to do and how you should care for your body. It is your right and your responsibility to make the decisions regarding your own body. Finding your own path to wellness (whatever that means for you) is a journey. The information here is only to give you options on how to care for your body on that journey.

    The Curious Herb Newsletter

    Explore the amazing world of herbal medicine with our Herb-of-the-Month newsletter. Each month will bring in-depth information about a different herb including its therapeutic benefits, history, uses, recipes, and so much more. Who knew learning herbalism could be so much fun!


    * indicates required


  • Peppermint and Rosemary Foot Soak

    Peppermint and Rosemary Foot Soak

    Peppermint and Rosemary Foot Soak

    Ahhhh… the oft overlooked foot bath! Taking 15-20 minutes just to sit and soak your feet is such a delicious luxury that is so easy and inexpensive to do, one wonders why it’s not on the weekly agenda.

    I’m a massage therapist and a couple of years ago, I got tired of trying to get my clients to relax for their appointment. I sat down and had myself a good think over this and decided it was silly to expect people to come straight in from their crazy, busy lives and instantly be able to relax. I thought maybe a better way to deal with this was to offer them a way to unwind for a few minutes before their massage actually began. Thus began the foot soak and wash before every appointment.

    I have a pretty fancy television (thanks to my husband’s job at Best Buy) and we take our TV and movie viewing experience pretty seriously, so our little movie room is completely painted black with black carpet and the windows are all blocked off. We have mood lighting around the ceiling, and it is one of the quietest rooms in the house. I found that YouTube has these amazing videos of sea life in the coral reeves, so I started doing the foot soaks in this room. I put on soothing spa music, put on one of the under-the-sea videos, and just let my clients soak their feet for a few minutes before their appointment. My regulars have learned that if they come in early for their appointment, they can have an even longer soak.

    Once they have soaked away their troubles for a few minutes, I come in, wash their feet and rub them with a little bit of orange, dry them off, and then into the massage room we go. Now, they are like putty in my hands!

    foot soak accoutrements

    And it’s so easy to do! I just went to the store and bought a few plastic dish tubs that were big enough to put 2 feet in. I am a soap maker, so I just use a bit of shaved soap for the wash, and a slice of orange to help remove any excess soap (plus it just looks fancy and adds to the ambience). A couple of towels to dry the feet and it’s all set.

    When I do this for my clients, it needs to be fairly quick. I mean, it’s lovely to have a little foot soak, but let’s face it, they are really there for the massage. When I do this for myself, it is a little bit bigger production. I like to take at least 15 minutes where I can sit and either stare at the lovely fishies on the screen or spend some time reading something just for fun. I also like to use an herbal salt soak to up the relaxation factor. Below is the recipe for one of my favorites, Peppermint and Rosemary Foot Soak. It will keep for a really long time in a canning jar, so I make a pretty good-sized batch, so I always have it on-hand. You can purchase the dried herbs from my online herb shop here.

    The soaking liquid can be as simple or fancy as you like, however. Here are some of my favorite ingredients.

    • Milk
    • Dried lavender or other herbs
    • Coconut oil
    • Essential oils
    • Sea salt
    • Epsom salt
    • Baking soda

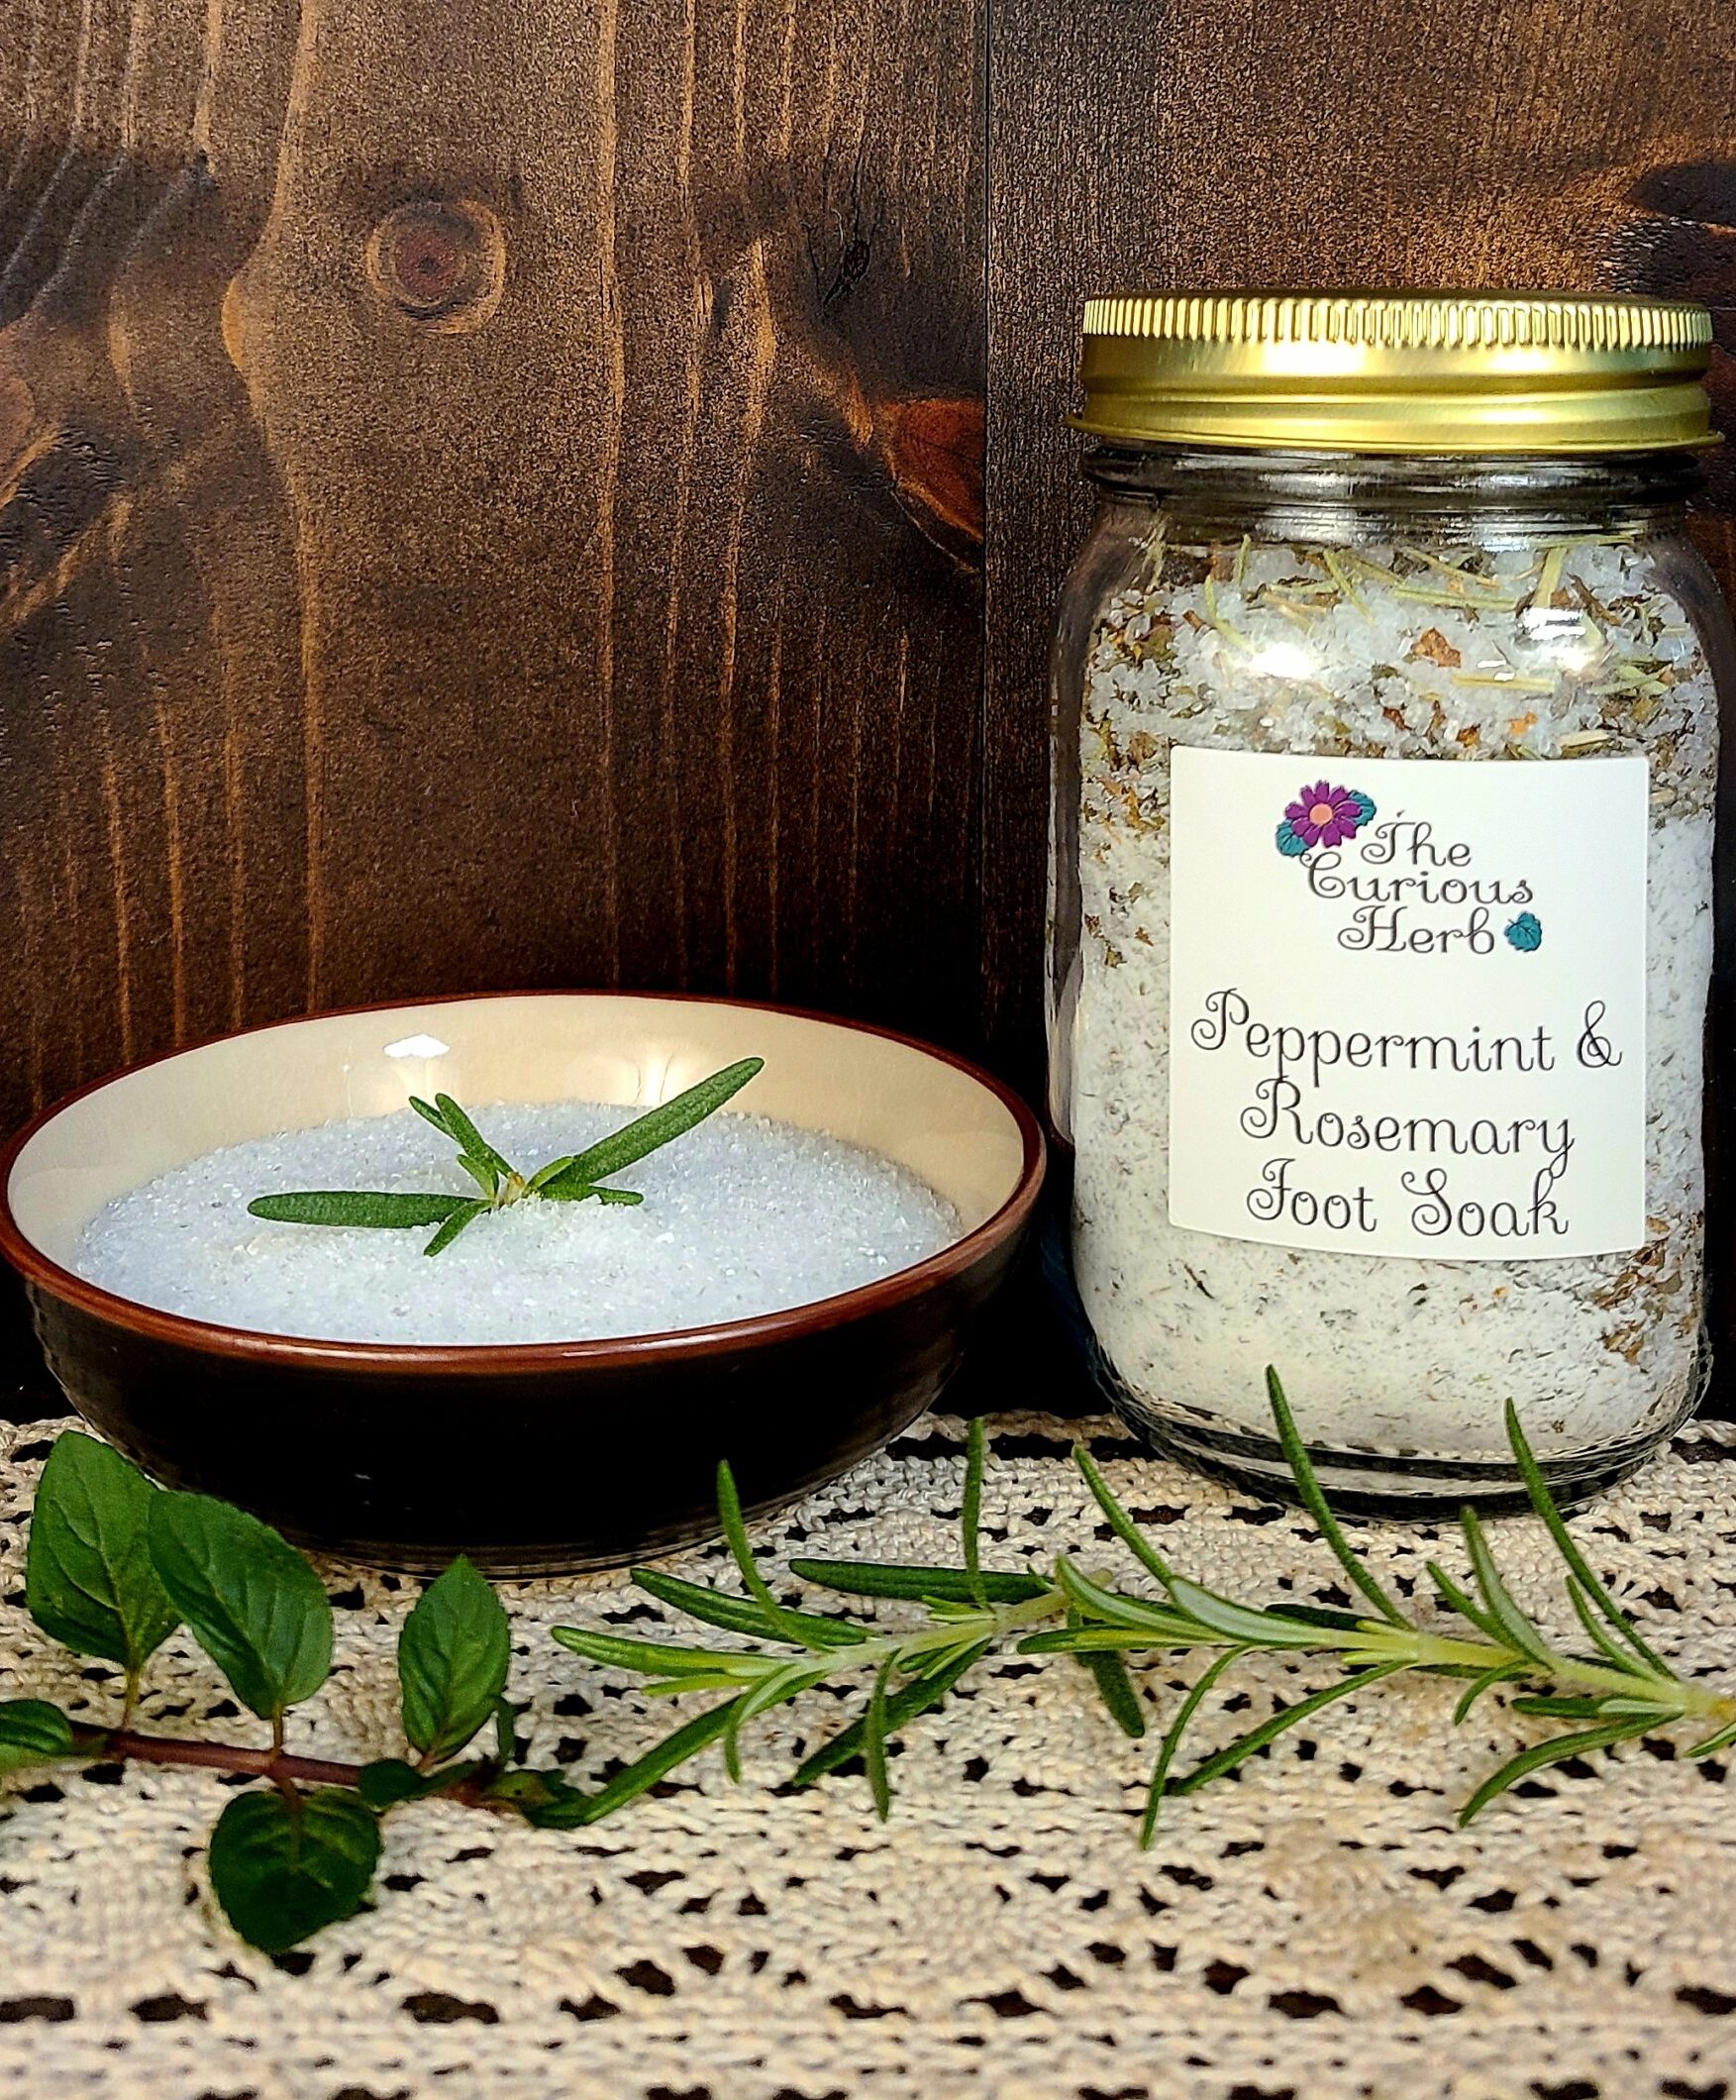
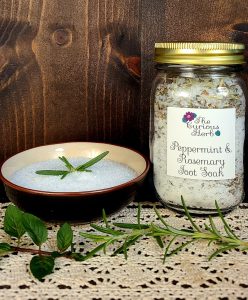
    Any combination of the above is lovely. For this particular recipe, I use dried rosemary and peppermint, Epsom salt, and baking soda. I mix everything up in a pint canning jar and label it, so I don’t forget what it is. It looks so pretty in the jar! You can also make extra and put cute labels on them to give as gifts.

    Peppermint & Rosemary Foot Soak

    For an herbal foot soak, you are basically making a tea for your feet so the herbs will need to steep for a few minutes before they are ready. I like to use a small teapot with a strainer for this. You can also use a cloth bag or any loose-leaf tea strainer. I find that if the herbs are just floating around in the foot bath, they tend to stick to my feet, and I have to sit there and pick them all off.

    I put about 2-3 spoonfuls of my herbal salt soak into the strainer of the teapot, pour boiling water over it, and let it steep for at least 10 minutes. While it’s steeping, I get everything ready. I will make myself a cup of tea to drink and maybe get a snack. I put a towel on the floor in case any water spills and get a hand towel to dry my feet off after I’ve soaked. I also like to have some foot cream to moisturize my feet after.

    When you are all set and your foot tea has steeped, fill a foot bath with warm to hot water. I find that if I can put my hand in the water and it feels good, it will probably feel good on my feet too. Please be very careful not to burn yourself!

    Place the foot bath on the towel on the floor in front of the chair you will be sitting in and then add the foot tea. Stick just a toe in the water to make sure it’s a good temperature. If it’s good, put both feet in, sit back, and relax. This is self-care. Let the chair take all your weight and maybe do a body scan to release any tension that might be lurking. Be mindful of the warm water on your feet and how amazing it feels. Feel good about yourself and that you carved out this time to do something purely for yourself. You deserve this for no other reason than that you are a human being. You don’t need to justify that you deserve this because you work hard, you take care of your family, you cleaned your house, or any other reason. You just deserve this period. If your house is a complete disaster and you blew off work, you still deserve this! Ok, I’m done preaching. Go soak your feet.

    Peppermint and Rosemary Foot Soak

    This recipe yields 12.5 oz of herbal salt soak. It will last you for about 5-6 soaks.
    Prep Time 5 minutes
    Servings 6 soaks

    Ingredients
      

    • 1/4 oz. dried peppermint
    • 1/4 oz. dried rosemary
    • 10 oz. Epsom salt
    • 2 oz. baking soda

    Instructions
     

    • Place all ingredients in a pint canning jar or other airtight container.
    • Give it a really good shake to mix up the ingredients.
    • Put a label on the jar so you know what it is and keep it out of reach of children.
    • This will keep for about 6 months.


  • Summer Pasta

    Summer Pasta

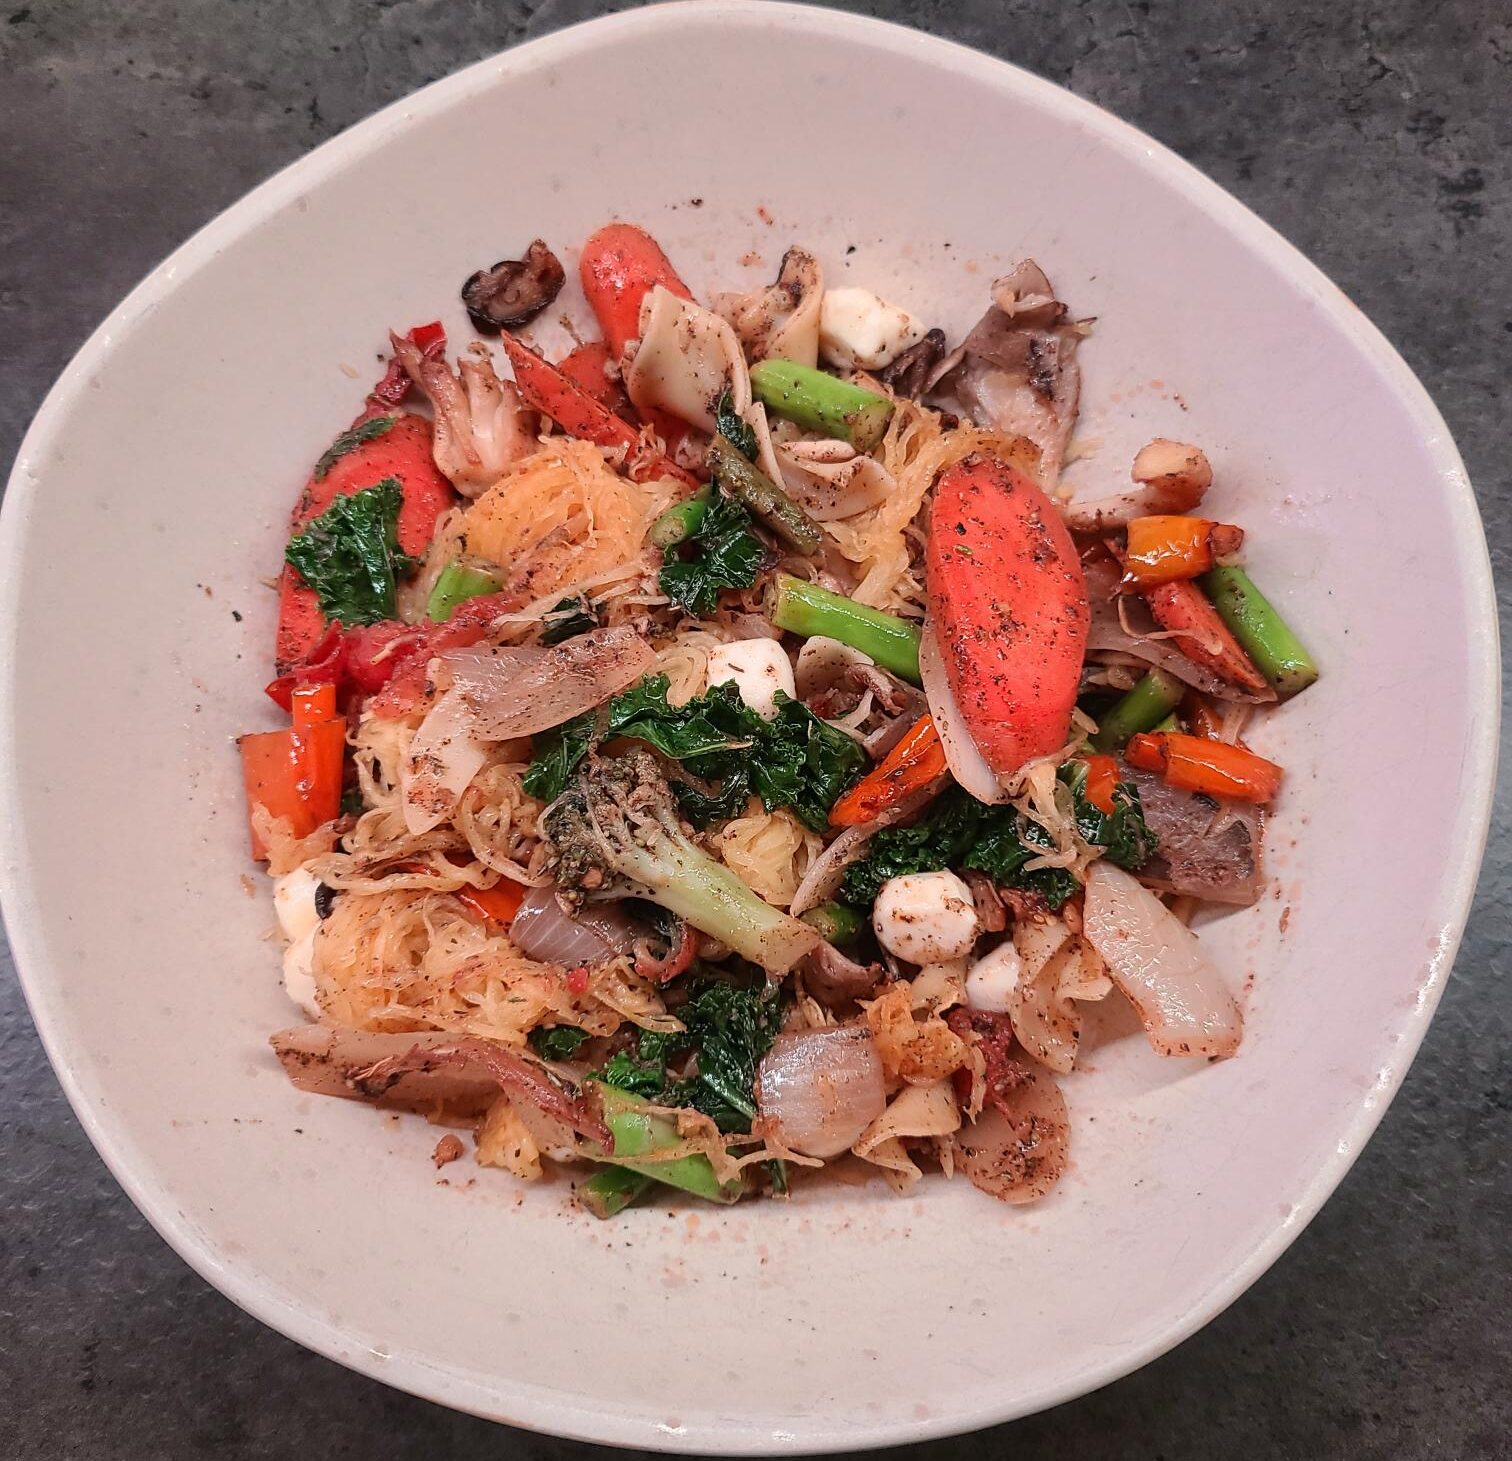
    Summer Pasta with Veggies Recipe

    Summer pasta with veggies

    When the weather starts warming up and I’m looking for something light and full of delicious veggies for dinner, I turn to what we refer to as Summer Pasta with Veggies. This quick and easy dinner is full of healthy veggies and is a great way to clean out the fridge because you can put almost anything into it. The recipe that I have below is merely a suggestion and a basic guideline. I generally feel that cooking is an art and baking is a science which means when you’re cooking, the “some of this and some of that” method is perfectly acceptable. I never follow a recipe exactly but have endeavored to use specific measurements for those of you who don’t follow my slackadaisical attitude towards cooking.

    This recipe is vegetarian but can easily be made vegan. You can also add meat to it. I am vegetarian and my husband is not, so I make mine as is and then cook up either chicken, shrimp, or bacon for his. Sometimes a combination of all three. I bet this would also be amazing with scallops.

    Make sure that you have a sauté pan large enough for all your veggies and the pasta. I use my big wok for this and it works great. Pasta really is best when it has been sauteed with the sauce or seasonings as it will soak up some of that yummy flavor.

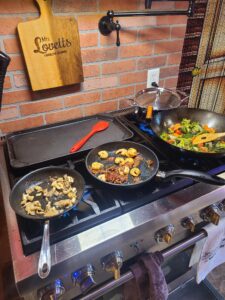
    Cooking summer pasta
    Veggies in the wok. Shrimp for my husband and mushrooms for me.

    Ingredients

    Typically, whatever I need to use up in my fridge goes into our Summer Pasta with Veggies with a few exceptions. I don’t usually use anything with really strong flavors like green peppers because I feel they overpower all the other flavors. This doesn’t mean that if you love green peppers, you can’t add them. This is just my preference. I do almost always use roasted sweet peppers, though.

    Other veggies I don’t use are cucumbers, turnips, parsnips, and beets (gross). I did use some bok choy once and wouldn’t recommend it. Definitely not my favorite.

    There are, however, many veggies that I think are perfect for this dish. 

    • Broccoli
    • Carrots
    • Peas
    • Snow peas
    • Snap peas
    • Brussels sprouts
    • Kale
    • Spinach
    • Cherry tomatoes
    • Sun dried tomatoes
    • Green beans
    • Asparagus
    • Zucchini
    • Spaghetti squash
    • Yellow squash
    • Mushrooms
    • Sweet peppers or roasted red peppers
    • Onions (always)
    • And probably a million others that I can’t think of off the top of my head.

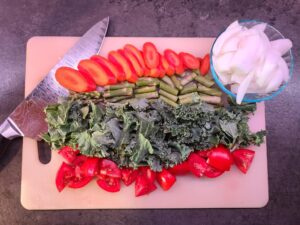
    Chopped vegetables

    Spice It Up

    Let’s discuss seasonings for a second. This dish can be as seasoned or not as you like. Sometimes, all I use is garlic, salt, pepper, and a handful of fresh basil. Other times, I’m feeling spicy, and I will throw in some crushed red pepper. I almost always use my Super Nutritious Herb Blend for this recipe because I want the added nutrition boost and the flavor works really well. You can also use Italian seasoning. I blend my own and keep a mason jar of it on-hand. You can get that recipe here.

    How To Make Summer Pasta with Veggies

    So, the basic idea for this dish is that you sauté all the veggies up with some olive oil, garlic, salt, pepper, Italian-type seasonings and then toss it with cooked pasta. We usually prefer bowtie. I put a handful of baby mozzarella pearls or chunks into a bowl and then cover that with the pasta and veggies. I don’t usually put the moz in while I’m cooking everything because it only sort of melts and gets all stringy and gloopy.

    Here’s a little more step-by-step if you like and I will have a complete recipe below.

    It’s best to have all your veggies collected and chopped up before you start cooking. I find this dish is best if everything is just barely cooked to keep that fabulous, fresh, summer flavor. As I’ve stated, you can pretty much use any veggies you want, but I recommend always using onion, cherry tomatoes, and something green.

    Once you have everything prepped and ready to go, start by sauteing 1 chopped onion in about 3 tablespoons of olive oil until it is well on its way to being caramelized. Once it is pretty well cooked, add garlic if you are using (highly recommend) and the rest of your veggies according to how long they take to cook and how cooked you like them. Things like broccoli take a bit longer than say, kale, so the broccoli usually goes in right after the onions are mostly cooked. You can pour in some water and place a lid on your pot to steam the broccoli a little bit to move it along. Once the broccoli is at least warmed up, add in carrots, zucchini, asparagus, Brussels sprouts, and any other veggies that take a bit to cook. I don’t usually put in things like spinach, kale, roasted red peppers, or tomatoes until right at the very end.  This is also when I put in my spices.

    If it is looking a little dry, add in more olive oil or throw in a few spoonfuls of the water you cooked your pasta in. Oh, I forgot. As I almost always do. Please don’t forget to cook your pasta while you are cooking the veggies. I have done this so many times and then all the veggies just have to sit and get mushy while you cook the pasta. I have started trying to remember to start water boiling for the pasta before I even start cooking the onions because I have forgotten so many times.

    Ok, so if your veggies look a little dry, you can add some pasta water because the starch from the pasta will thicken up into a little bit of a sauce and it’s delicious!

    Now toss in your cooked pasta and sauté it all a bit and serve!

    Here’s the breakdown…

    1. Gather up whatever veggies you are going to use and get everything chopped up.
    2. Start water boiling for pasta and cook according to the package.
    3. In a large sauté pan or wok (this is my preferred cooking receptacle for this), sauté onions.
    4. When they are pretty well cooked, start adding in other veggies.
    5. Season to taste.
    6. When the veggies are either completely cooked or 95% of the way there, toss in the drained pasta.
    7. Serve in pasta bowls with fresh baby mozzarella and enjoy!

    Summer Pasta with Veggies Recipe

    A light summer pasta dish full of fresh veggies.
    Prep Time 30 minutes
    Cook Time 30 minutes
    Course Main Course
    Cuisine Italian
    Servings 4

    Ingredients
      

    • 1 large onion red, white, or yellow
    • 1 broccoli crown chopped
    • 2 handfuls of spinach or kale cut or torn up
    • 6 cherry tomatoes, halved you can use more if you want
    • 2 garlic cloves chopped or minced
    • 3 tbsp olive oil
    • 8 oz bowtie pasta or whatever shape seems fun
    • 1 pkg baby mozarella cheese
    • 1 tsp Italian seasoning
    • 1/4 tsp salt
    • 1/4 tsp pepper

    Instructions
     

    • Cook pasta according to the instructions
    • While the pasta is cooking, heat the olive oil in a large sauté pan and cook the onions.
    • When the onions are mostly cooked, add the broccoli and cook till they are mostly cooked.
    • Add the tomatoes, spinach or kale, and seasonings and cook till everything is done to your liking
    • Drain the cooked pasta and add to the sauté pan. Sauté for a couple minutes
    • Place a few pieces of mozzarella in pasta bowls and spoon the pasta and veggies over it.
    • Serve and enjoy!

    Notes

    Please feel free to use any veggies you like. This dish is also great with shrimp, chicken, or scallops. I also really like it with a bit of crushed red pepper to give it a kick. Feel free to experiment and make this your own. It’s really hard to screw this one up.
    Keyword healthy dinner, pasta, summer


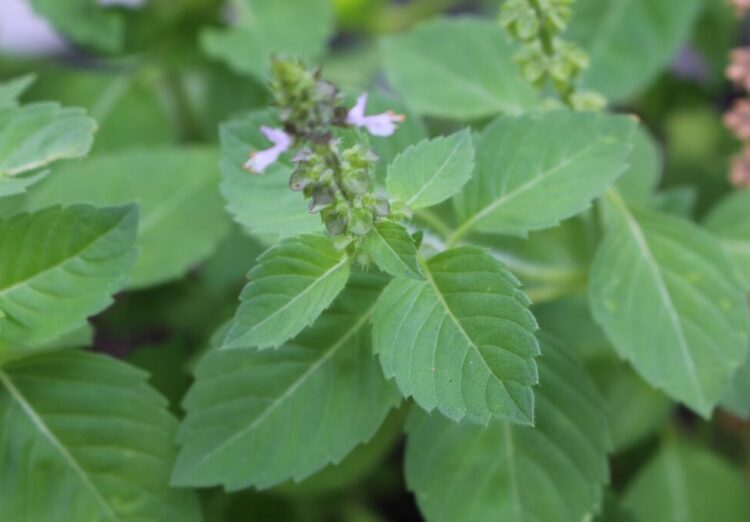
  • Tulsi (holy basil)

    Tulsi (holy basil)


    Botanical Name – Ocimum sanctum

    Family: Lamiaceae

    Energetics: warm, dry, relaxant

    Taste: aromatic, sweet, pungent, bitter

    Parts used: flowers and leaves

    Affinities: nervous, endocrine, digestive systems

    Actions: nervine, exhilarant, adaptogen, digestive, hepatic, hypoglycemic, antimicrobial, diffuse, circulatory modulator, diaphoretic

    Preparations: tea, bath tea, tincture

    Cautions: Generally regarded as safe for all ages. 

    Therapeutic Uses:

    • Tulsi is excellent for support of the parasympathetic nervous system (rest and digest). It helps your body handle stress more affectively. And that can be any type of stress from the stress of a long-term illness to the anxiety of holiday seasons. 
    • As an exhilarant, it is gently uplifting, helping you to feel better without giving you a feeling of being unnaturally “high”. When you feel like you’ve had a really bad day and that 4th glass of wine sounds really delicious, tulsi tea is actually what you need.
    • When digestive issues are causing your anxiety and stress, tulsi’s aromatic and diffusive actions will help get things moving in the gut. Often if you feel anxious, jittery, or nervous and aren’t sure why, gut issues are actually to blame. Often called your “second brain”, your gut health is of vital importance to your overall mental and emotional well-being.

    Tulsi (holy basil)

    The Curious Herb Newsletter

    Explore the amazing world of herbal medicine with our Herb-of-the-Month newsletter. Each month will bring in-depth information about a different herb including its therapeutic benefits, history, uses, recipes, and so much more. Who knew learning herbalism could be so much fun!


    * indicates required


  • Herbs de Provence

    Herbs de Provence

    Herbs de Provence

    What can I say about herbs de Provence? I love it. I use it often. I feel like it is a greatly under-appreciated blend. It’s freaking delicious and if you don’t use it, you totally should. So, yeah. That’s what I’ve got for this blog post.

    Ok. Just kidding. I can probably come up with some more stuff to say. I really do love herbs de Provence. I think it’s just that little hint of lavender that makes it seem extra to me. Extra special. Extra sophisticated. Extra snooty. Especially when I say, “I’m using Herbs de Provence in this dish”. I make sure to say it with a super exaggerated French accent. I can’t actually do a French accent so it’s pretty bad. I feel cool though, so I got that going for me.

    You might be asking what kind of recipes call for this particular blend. Well, you can actually use it quite a bit. My personal favorite is shepherd’s pie. Although, technically what we’ve always eaten as “shepherd’s pie” in my family is usually cottage pie. From what I understand, the main difference is that shepherd’s pie uses ground lamb and cottage pie uses ground beef. I make a vegetarian version of this with minced mushrooms and ground walnuts and just call it shepherd’s pie. So, I don’t know. You can be picky with the name if you choose, but my parents called it shepherd’s pie so I’m sticking to that.

    Anyway, back to herbs de Provence. Maybe it’s weird that I use a French herb blend in my Scottish/ Irish/ English dish, but it’s delicious so I don’t question it.

    Other ways to use this delightful concoction are in roasted chicken and roasted potatoes and/ or veggies. It’s great on fish. You can flavor rice, cous cous, or quinoa with it. You can add it to oil and vinegar for a fabulous vinaigrette. To me, this blend just adds a sophistication to most dishes. As I was researching for this blog post, I came across a recipe for Tomates à la Provençale which seems to be tomatoes cooked in their own juice on the stove then you finish them in the oven with a topping of breadcrumbs, herbs de Provence, and garlic. Um, yes please! Why am I not eating that right now???

    As you can see, there are many uses for herbs de Provence and you can see why it is a staple in my kitchen and should be in yours too. So, let’s make some shall we? You can purchase all of the herbs that you need for this recipe here.


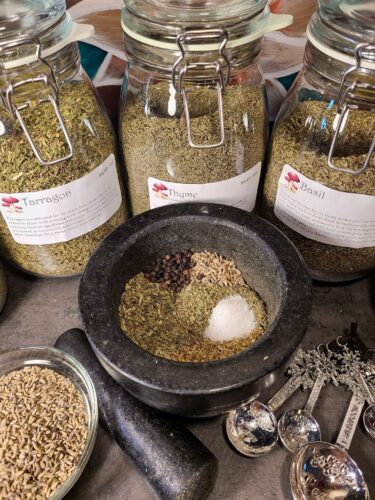
    Herbs for making Herbs de Provence.

    Herbs de Provence

    Herbs de Provence is a delicious herb blend that adds a bit of sophistication to any dish.
    Prep Time 5 minutes

    Equipment

    • 1 Herb Grinder

    Ingredients
      

    • 1 tbsp Oregano
    • 1 tbsp Rosemary
    • 1 tbsp Thyme
    • 1 tbsp Marjoram
    • 1 tbsp Basil
    • 1 tbsp Tarragon
    • 1 tsp Lavender
    • 1 tsp Salt
    • ~1 tsp Pepper

    Instructions
     

    • Grind any herbs that are not already ground.
    • Mix all ingredients together.
    • Store in an airtight container and make sure to label the jar.

    The Curious Herb Newsletter

    Explore the amazing world of herbal medicine with our Herb-of-the-Month newsletter. Each month will bring in-depth information about a different herb including its therapeutic benefits, history, uses, recipes, and so much more. Who knew learning herbalism could be so much fun!


    * indicates required


  • Nostalgia Italia Seasoning Blend

    Nostalgia Italia Seasoning Blend

    Nostalgia Italia Seasoning Blend

    A hundred years ago, I went on a solo backpacking trip around Europe. It was absolutely amazing. I got to see and do and experience the rich history and culture of 7 different countries over about 2 months. I have more memories of that trip than could fit into a hundred blog posts, but one very special memory is the day I spent at a spice market in Italy. It was mind blowing and if I wasn’t backpacking and didn’t have to carry every single thing I bought for 2 months, I possibly would have bought out the market. Everywhere I walked were huge vats of spices. Individual spices, spice blends, tea blends, and more. Although I couldn’t buy as much as I would have liked, I did buy a few different things. One was an Italian seasoning blend and one was a pizza seasoning blend. When I got home, I hoarded those blends like they were gold. I only brought them out for the most special occasions. Sadly, they eventually ran out, but I will never forget how amazing they were. So much better than anything I can get at the grocery store now, but you make do with what you can get.

    A few years ago, I ran out of my standard, grocery store Italian seasoning right in the middle of making dinner. Well crap! What’s a girl to do? I rummaged around my spice rack to see what I could come up with and found that somehow, I happened to have most of the individual herbs to make my own. So, I mixed up some of this and some of that and created my own blend and holy moly. It was delicious! No more grocery store Italian seasoning for me. Even though the individual herbs I used were from the grocery store, being able to blend them to my specific taste without any fillers just made it awesome.

    Now I always have my own Italian seasoning blend on hand. It is perfect for marinara, alfredo sauce, added to oil for bread dipping, salad dressings, and so much more.

    Feel free to tweak the recipe to suit your specific taste. Afterall, isn’t that why you are blending your own? You can purchase all of the herbs that you need from my online herb shop here.

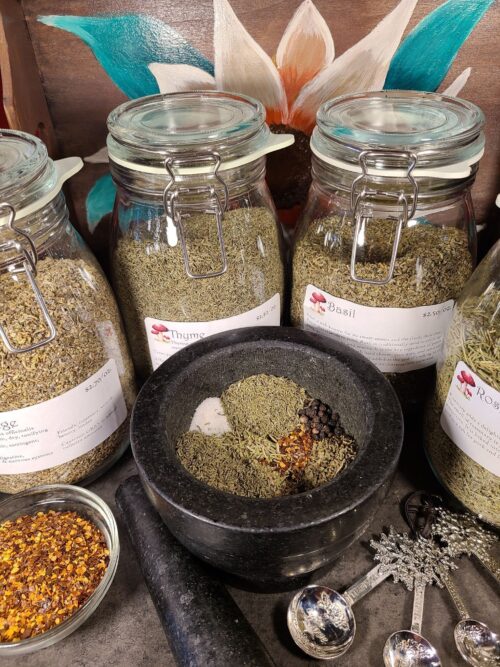
    Italian Seasoning blend herbs

    Nostalgia Italia Seasoning Blend

    The perfect blend of Italian herbs and spices for marinara, alfredo, salad dressings, and more.
    Prep Time 5 minutes

    Equipment

    • 1 Herb Grinder

    Ingredients
      

    • 2 tbsp Oregano
    • 2 tbsp Basil
    • 1 tbsp Sage
    • 1 tbsp Rosemary
    • 1 tbsp Thyme
    • 1 tbsp Marjoram
    • 1 tsp Crushed Red Pepper Flakes
    • 1 tsp Salt
    • 1 tsp Pepper or Peppercorns

    Instructions
     

    • Grind any herbs or spices that are not already ground.
    • Mix all ingredients together.
    • Store in an airtight container and make sure to label the jar.

    Notes

    Feel free to make this recipe your own. If you don’t have or don’t like any of the ingredients, simply leave them out or change the quantity. Remember, this is cooking not baking. Cooking is an art, baking is a science.

    The Curious Herb Newsletter

    Explore the amazing world of herbal medicine with our Herb-of-the-Month newsletter. Each month will bring in-depth information about a different herb including its therapeutic benefits, history, uses, recipes, and so much more. Who knew learning herbalism could be so much fun!


    * indicates required